By Colin B., published November 6, 2026, last reviewed November 6, 2026By Colin B., updated Nov 6, 2026We earn a commission if you buy through our links. How this works
An airbrush lays down paint thinner and smoother than any brush, which is why miniature painters, scale modelers, cosplayers and illustrators all end up with one. The learning curve is mostly about thinning paint and keeping the brush clean. Here's which airbrush and compressor to buy, the paints and cleaners that make life easier, and how to stay safe.
00
The short version
Starter budget
$325 to $450
How hard
Some practice
Day one
Order an airbrush, a tank compressor, thinner, cleaner and a respirator.
Gravity-feed brushes have a cup on top, so they work at low pressure and waste little paint. Dual action means pressing the trigger controls air and pulling back controls paint, which gives you fine control once you learn it.
The compressor matters as much as the airbrush.
Get one with a tank, a pressure regulator with gauge and a moisture trap. The tank smooths out pulses, and the trap stops water spitting onto your work. Skip canned air: it's expensive and loses pressure as it cools.
Paint must be thin, like milk.
Most problems, from clogs to spidery lines, come from paint that's too thick. Start with airbrush-ready paints and a matching thinner, and clean the brush after every color.
02
Airbrushes
Most beginners do best with a gravity-feed, dual-action airbrush with a needle around 0.3 to 0.35 mm. That size handles base coats and reasonably fine detail. Brand matters more here than for most tools: better airbrushes have smoother triggers, tighter seals and parts you can actually buy when a needle bends, which it will.
Jar underneath. Holds more paint for large areas like T-shirts and props.
Paint cup
Bottle below
Pressure
Higher, 25-40 PSI
Cleanup
Slower
Best for Large surfaces, T-shirts, cosplay props, quick color swaps Trade-off Needs more air pressure and gives less fine control
Best starter$69.99as of Nov 6, 2026★★★★★ our ratingIn Stock
Iwata
Neo CN Dual Action Gravity Feed Airbrush
Iwata's beginner brush, with a 0.35 mm nozzle, two cup sizes and a smooth dual-action trigger. Atomizes well at low pressure and comes apart easily for cleaning. About $70. 2,300+ reviews at 4.6 stars.
The airbrush many hobbyists buy once and keep for years. A 0.35 mm nozzle that sprays fine lines and smooth coats, a forgiving self-centering nozzle and parts available everywhere. About $174. 1,600+ reviews at 4.7 stars.
An airbrush compressor supplies steady, low-pressure air. Look for three things: a tank, which evens out the pulse of the piston; a regulator with gauge, so you can set the pressure precisely; and a moisture trap, so condensation doesn't spit onto your work. Auto shut-off keeps the motor from running constantly and makes it quieter.
Best starter$139.99as of Nov 6, 2026★★★★★ our ratingIn Stock
Master Airbrush
Cool Runner II Dual Fan Tank Compressor (1/5 HP)
Everything a beginner needs in a compressor: a 3-liter tank for steady air, a diaphragm regulator with gauge, a water trap filter, two cooling fans and automatic shut-off when you're not spraying. About $140. 830+ reviews at 4.7 stars.
A full starter kit: a 1/5 HP Cool Runner II compressor, three Master airbrushes including a G22 gravity-feed dual action, and a starter set of acrylic paints with reducer. Lets you try airbrushing without buying everything separately. About $150. 7,200+ reviews at 4.6 stars.
A quiet, maintenance-free piston compressor in an all-metal case, with an adjustable pressure gauge, moisture filter and automatic shut-off. A good pick if you paint in a shared room and noise matters. About $385.
We like
Quiet and compact
Tough metal case, zero maintenance
Know this
Nearly three times the price of the Master tank compressor
Airbrush paints are thinner than brush paints so they flow through a tiny nozzle. Pre-thinned, airbrush-ready acrylics are the easiest start, since you can spray them straight from the bottle or with a few drops of thinner. Water-based acrylics clean up with water and airbrush cleaner and are far safer to spray indoors than solvent paints.
Best starter$27.99as of Nov 6, 2026★★★★★ our ratingIn Stock
Vallejo
Model Air Basic Colors Set (8 Colors)
Eight pre-thinned, airbrush-ready acrylics that spray straight from the dropper bottle. The standard paint for miniatures and scale models, with hundreds of colors to add later. About $28. 3,300+ reviews at 4.7 stars.
Larger 2 oz bottles of highly pigmented opaque colors, made for illustration, T-shirts, props and bigger surfaces where you go through more paint. About $58.
Thinner brings paint to the right consistency without breaking down the binder the way plain water can. Flow improver slows drying, which helps with tip dry, the paint crust that forms on the needle and makes spray sputter. Airbrush cleaner dissolves dried acrylic in the brush between colors and at the end of a session.
Best starter$16.23as of Nov 6, 2026★★★★★ our ratingIn Stock
Vallejo
Airbrush Thinner for Acrylic Paints, 200 ml
Thins acrylics for smooth spraying while keeping them sticking and covering properly. A big bottle lasts many sessions. About $16. 19,000+ reviews at 4.8 stars.
Slows drying slightly so paint doesn't crust on the needle tip, the main cause of sputtering on fine lines. A couple of drops in the cup is enough. About $15.
Dissolves dried acrylic in the cup, nozzle and needle. Spray a cup of cleaner through between colors and at the end of every session to prevent clogs. About $13. 15,000+ reviews at 4.8 stars.
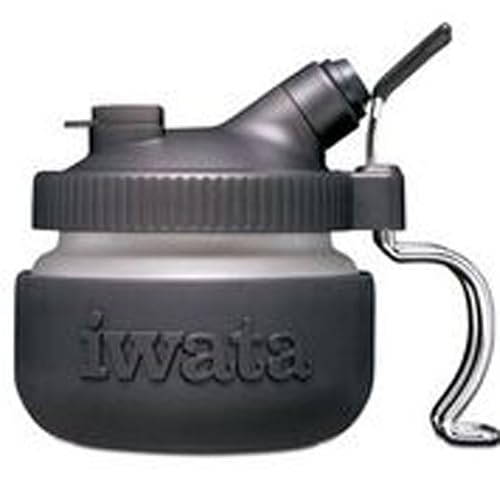
A cleaning pot is a jar you spray into while flushing the airbrush between colors. It catches the paint mist and has a filter that lets air escape. It also gives you a safe place to park the airbrush, so it doesn't roll off the desk and bend the needle.
Best starter$27.37as of Nov 6, 2026★★★★★ our ratingIn Stock
Iwata-Medea
Universal Spray Out Pot
A sturdy spray-out jar with a filtered lid and a holder that fits most airbrushes. Catches overspray when you flush colors and keeps mist out of the room. About $27. 1,000+ reviews at 4.8 stars.
Airbrushing turns paint into a fine mist that hangs in the air and gets into your lungs, even with water-based acrylics. A fitted respirator with particulate and organic vapor filters is essential. A spray booth pulls overspray away from you and your room through a filter and exhaust hose. Ideally, use both.
Best starter$32.99as of Nov 8, 2026★★★★★ our ratingIn Stock
3M
P95/OV Paint Project Reusable Respirator
A reusable half-mask with P95 particulate filters and organic vapor cartridges, the right protection for airbrush mist. Replace the filters as they load up. About $33. 2,700+ reviews at 4.6 stars.
Portable Airbrush Spray Booth Kit with Dual Exhaust Fans
A folding booth with two exhaust fans, a filter and an exhaust hose you vent out a window. Pulls overspray away from your face and keeps it off the rest of the room. About $120. 2,000+ reviews at 4.5 stars.
An airbrush rewards practice on paper before paint ever touches a model. Here's a four-week plan for trigger control, thinning, cleaning and your first real project, without the clogs and spatters that make beginners give up.
Most beginners blame the airbrush when things go wrong. Nearly always it’s paint that’s too thick, pressure that’s off, or a brush that wasn’t cleaned properly after the last color. A month of short, focused practice fixes all three.
Week 1: Trigger control on paper
Set the compressor to about 20 PSI. Fill the cup with a few drops of airbrush-ready paint and practice on plain printer paper or card. Put your respirator on every time.
The dual-action rule: press down first for air, then pull back for paint. Release in reverse: forward to stop paint, then let up for air. That order prevents spatters and keeps the tip clean.
Practice these, 15 minutes a day:
Dots: close to the paper, a tiny pull back, release. Try to make them the same size.
Lines: move your whole arm, start moving before you pull back, stop paint before you stop moving.
Gradients: a soft fade from solid color to nothing, sweeping back and forth.
Now learn to thin paint. Regular acrylics need thinning to about the consistency of skim milk. Airbrush-ready paints may need only a drop or two of thinner. Mix in the cup, a few drops at a time.
Test on paper and read the results:
Spidery, runny lines: too thin, too much pressure or too close. Back off.
Grainy, rough spray: too thick, or too far away. Thin a little.
Sputtering: tip dry. Wipe the needle tip with a damp brush, or add a drop of flow improver.
Change one thing at a time so you learn what each adjustment does.
Week 3: Cleaning routine
Cleaning is the habit that keeps an airbrush working. Between colors: spray out what’s left, add a few drops of cleaner, swirl with an old brush and spray it through into the cleaning pot. Repeat with water until it sprays clear.
At the end of each session, do the same, then pull the needle back gently and wipe it. Once a week or when spray goes odd, strip the airbrush following the parts diagram, soak metal parts in cleaner and reassemble. Never force the needle forward; a bent tip ruins the spray pattern.
Pick something simple and forgiving: a cheap miniature, a plastic model part or a T-shirt stencil design. Prime it first with an airbrush primer or a rattle can. Then build color with several thin coats, letting each dry for a few minutes, instead of one heavy coat.
Try a basic highlight: spray a base color all over, then a lighter shade from above only. That single trick, called zenithal highlighting on miniatures, makes even a simple paint job look three-dimensional.
What not to worry about yet
Don’t worry about freehand camouflage, stencils with fine edges or micro-detail work. Don’t buy more airbrushes or a fancy compressor. Master trigger control, thinning and cleaning with one brush first; everything else builds on those.
09
What you don't need yet
Beginners get pressured to buy a lot of stuff that doesn't help them.
Here's what we'd skip on day one.
A second airbrush One 0.35 mm brush handles base coats and most detail. Add a fine-detail or large-nozzle brush once you know what you paint most.
A $300+ airbrush High-end brushes shine in skilled hands. Learn trigger control and thinning on a Neo or Eclipse first.
Solvent-based paints Lacquers spray beautifully but need serious ventilation. Water-based acrylics are safer to learn with indoors.
An ultrasonic cleaner Flushing with cleaner after each color and a monthly strip-down keeps a brush clean. Ultrasonic baths are a nice extra later.
10
Your first seven days
A short, real plan to get from gear-on-doorstep to actually doing it.
Order an airbrush, a tank compressor, thinner, cleaner and a respirator.
An Iwata Neo, a tank compressor, a basic paint set, thinner, cleaner, a cleaning pot and a respirator come to about $325. Add a portable spray booth for indoor painting and you're near $450.
12
Common questions
Gravity feed or siphon feed for a beginner?
Gravity feed. It sprays well at low pressure, wastes less paint and is faster to clean. Siphon feed is useful for large surfaces like T-shirts or props where you need a lot of paint.
Single action or dual action?
Dual action. You control air with downward pressure and paint flow by pulling the trigger back, which lets you vary line width as you spray. It takes a few sessions to learn but gives far more control.
What PSI should I airbrush at?
Most acrylics spray well at 15 to 25 PSI. Go lower, around 10 to 15, for fine detail close to the surface, and higher for base coats or thicker paint. Adjust in small steps and test on paper.
Why does my airbrush keep clogging or spitting?
Usually paint that's too thick, tip dry on the needle or water in the air line. Thin paint to milk consistency, wipe the needle tip often, add a drop of flow improver and drain the compressor tank.
Do I really need a respirator for acrylic paint?
Yes. Airbrushing makes a fine mist of pigment and binder that you'd otherwise breathe in, even with water-based paint. A fitted respirator with P95 or better filters is cheap protection.
Can I use canned air instead of a compressor?
Only to try it once. Canned propellant is expensive and loses pressure as the can gets cold. A basic tank compressor pays for itself within a few weeks of regular painting.
 Just Beginning