By Colin B., published November 8, 2026, last reviewed November 8, 2026By Colin B., updated Nov 8, 2026We earn a commission if you buy through our links. How this works
Building an arcade cabinet mixes woodworking, wiring and a little Linux into something your whole household will play. A tabletop bartop is a weekend project; a full upright is a bigger build. Here's how to choose a cabinet style, which computer to put inside, the joysticks and buttons that feel right, and the legal way to fill it with games.
00
The short version
Starter budget
$397 to $433
How hard
Some practice
Day one
Choose a cabinet style and order a kit, controls, a computer and a monitor that fits.
A bartop sits on a table, takes a weekend to build and fits a 19 to 32 inch screen. A full upright is the real arcade experience but needs serious space and tools. Modding an Arcade1Up is the quickest route to an upright, since the cabinet and controls are already built.
Match the computer to the games.
A Raspberry Pi 5 handles classic 1980s and 1990s arcade games beautifully. A small Windows mini PC is better for later 3D arcade games, light guns and front ends like LaunchBox.
Only play games you're allowed to.
Downloading commercial ROMs you don't own is copyright infringement in most countries. Legal options include freely released ROMs listed on the MAME site, homebrew games and dumping your own boards and cartridges.
02
Cabinet kits
Flat-pack kits come with cut panels, a control panel drilled for joysticks and buttons, and assembly hardware. You add the monitor, computer, controls and speakers. That saves you designing and cutting, which is the hardest part for most beginners. Check which screen size the kit fits and whether the control panel is drilled for HAPP or Sanwa parts.
Best starter$159.99as of Nov 8, 2026★★★★★ our ratingIn Stock
LVL23
2 Player Bartop Arcade Cabinet Kit for 19" to 23" Screens
A two-player bartop kit that takes a 19 to 23 inch monitor, with the control panel offered drilled for either HAPP controls with 28 mm buttons or Sanwa-style controls with 30 mm buttons. Controls, screen and computer are bought separately. About $160. 8 reviews at 3.8 stars.
2 Player Bartop Arcade Cabinet Kit for 27 to 32 Inch Screens
A larger bartop for a 27 to 32 inch screen, for a bigger picture that's easier to play from a couple of feet back. Same idea as the LVL23: cut parts and hardware, with your own monitor and controls. About $230. 8 reviews at 4.3 stars.
A finished upright cabinet with 14 classic games built in. Many builders play it as-is for a while, then mod it with a Raspberry Pi or mini PC. The fastest way to an upright in your living room. About $550. 997 reviews at 4.6 stars.
25ft Roll of 3/4" Plastic T-Molding for Arcade Cabinets
The plastic edge trim that gives a cabinet its classic arcade look and covers rough MDF edges. A 25-foot roll of 3/4-inch molding is enough for a bartop. About $21. 108 reviews at 4.7 stars.
The computer runs the emulators and a front end, the menu you scroll through to pick a game. A Raspberry Pi with RetroPie or Batocera is the classic choice: cheap, quiet and great for 1980s and 1990s arcade games. A small Windows mini PC costs more but runs later 3D arcade games and Windows front ends like LaunchBox and BigBox.
Best starter$127.49as of Nov 8, 2026★★★★★ our ratingIn Stock
Raspberry Pi
5 4GB
The board behind most home arcade builds, with plenty of power for classic arcade and console emulation through RetroPie or Batocera. 4GB of RAM is plenty for an arcade build. About $127. 1,600+ reviews at 4.7 stars.
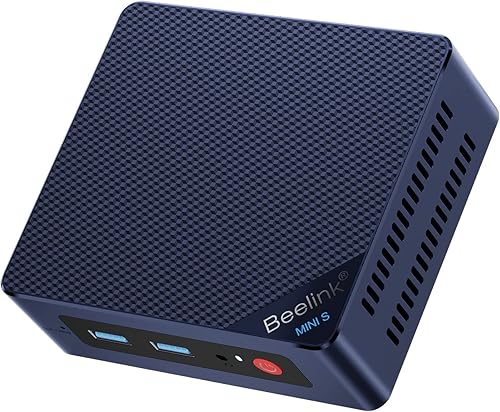
A small Windows mini PC with a quad-core Intel N95, 8GB of RAM and a 256GB SSD. Runs Windows front ends like LaunchBox and a wider range of emulators than a Pi, with storage built in. About $239. 1,100+ reviews at 4.4 stars.
Joysticks, buttons and a USB encoder are the heart of the cabinet. The encoder turns stick and button presses into a USB game controller the computer understands. Buy a kit with everything matched for your first build. Japanese-style Sanwa sticks feel light and precise; American-style HAPP sticks are stiffer, like classic US arcades.
Best starter$44.99as of Nov 8, 2026★★★★★ our ratingIn Stock
EG STARTS
2 Player Arcade Games DIY Kit (2 Joysticks, 20 LED Buttons, 2 Zero Delay Encoders)
Two joysticks, 20 LED-lit buttons, two zero-delay USB encoders and the wiring to connect them. Plug-and-play with Raspberry Pi and Windows. The easiest way to wire a two-player panel. About $45. 507 reviews at 4.5 stars.
A one-player kit with a joystick, LED buttons and an encoder. Enough for a single-player build or for testing the software before committing to a two-player panel. About $26. 610 reviews at 4.4 stars.
The genuine Sanwa stick used in many Japanese arcade cabinets and fight sticks. Adjustable for 4-way or 8-way play and noticeably smoother and more precise than kit joysticks. A common first upgrade. About $29 per stick. 1,900+ reviews at 4.6 stars.
Match the monitor to the kit: the LVL23 takes 19 to 23 inch screens. A basic office monitor is fine, because classic arcade games run at very low resolutions. Look for HDMI input, a thin bezel and a VESA mount or flat back. Built-in speakers are handy for a first build, but a small pair of USB speakers usually sounds better.
Best starter$79.99as of Nov 8, 2026★★★★★ our ratingIn Stock
Acer
19.5in 1600x900 75Hz Professional Office Monitor K202Qbi
A 19.5-inch monitor that fits the small end of a 19 to 23 inch bartop kit, leaving room around the screen for a bezel. Plenty sharp for classic arcade games. About $80. 530 reviews at 4.4 stars.
A cheap 22-inch 1080p monitor with HDMI and VGA inputs and built-in speakers, at the large end of what the LVL23 kit fits. A bigger screen for less money. About $65. 681 reviews at 4.5 stars.
A bartop arcade is a perfect first build: a little software, a little wiring and a little woodworking. Here's a four-week plan that gets the software right first, then the controls, then the cabinet, so you finish with a machine that actually works.
The most common first-build mistake is assembling the cabinet first and then discovering the software or wiring doesn’t work. Flip the order. Get the computer and controls working on your desk, then put them in a box.
Week 1: Software on the bench
Flash RetroPie or Batocera onto a microSD card for your Raspberry Pi, or install LaunchBox on a mini PC. Connect it to a TV or monitor with a USB keyboard and learn the front end: adding games, setting video options and navigating menus.
Load a few legally free arcade games from the MAME site, or homebrew titles, and make sure they run smoothly. This week is about learning where the settings live, before you’re doing it crouched behind a cabinet.
Unbox the joystick and button kit and connect everything to the encoders on a table. Plug the encoders into the computer, then map the controls in the front end: player 1 and player 2 joysticks, buttons, start and coin.
Decide on a button layout before you mount anything. Most two-player panels use six buttons per player in two rows of three, plus start and coin buttons. Write the mapping down; you’ll need it again.
Week 3: Build the cabinet
Dry-fit every panel before gluing so you understand how it goes together. Then glue and screw the sides, base and top, checking that it’s square. If your kit has a slot for T-molding, tap it in with a rubber mallet, starting at the bottom back corner.
Mount the controls in the control panel, the monitor behind the bezel and the computer on a shelf inside. Leave room for airflow and an easy way to reach the power and USB ports.
Route cables neatly with zip ties and a power strip with one switch, so the whole cabinet turns on and off together. Add art, a marquee light or speakers if you like.
Then tune. Turn off games you’ll never play, set up favorites, and try a CRT-style shader for that authentic arcade glow. Invite people over. A cabinet only feels finished once someone else has played it.
What not to worry about yet
Don’t worry about light guns, trackballs, coin doors or a full upright. Get a bartop running smoothly with a curated list of games you love.
Beginners get pressured to buy a lot of stuff that doesn't help them.
Here's what we'd skip on day one.
A full upright cabinet build Uprights need a lot of plywood, tools and space. Build a bartop first and learn the wiring and software on a smaller project.
A light gun or trackball They're fun for specific games but complicate the build. Add them once your cabinet runs reliably.
A CRT monitor CRTs look authentic but are heavy and hard to find. Modern front ends have CRT-style filters that get you close.
A coin door It's pure decoration on a home build. A start button does the same job.
08
Your first seven days
A short, real plan to get from gear-on-doorstep to actually doing it.
Choose a cabinet style and order a kit, controls, a computer and a monitor that fits.
A bartop kit, a Raspberry Pi 5, a two-player control kit and a 22-inch monitor come to about $397. Swap in the Acer monitor and add T-molding trim and you're near $433. Add about $25 for the Pi's power supply, case and memory card if you don't already have them.
10
Common questions
Is it legal to build an arcade cabinet?
Building the cabinet and running emulators is legal. Downloading commercial ROMs you don't own the rights to generally isn't. Stick to freely released ROMs, homebrew games, legally purchased collections or dumps of boards and cartridges you own.
Raspberry Pi or mini PC?
A Raspberry Pi 5 is cheaper and quieter and is excellent for classic arcade games. A mini PC runs Windows front ends and more demanding emulators. Start with a Pi unless you know you want later 3D arcade games.
Bartop or full-size upright?
Bartop for a first build. It's cheaper, faster and fits on a table. Full uprights feel more authentic but need about 2 by 3 feet of floor space and much more woodworking.
Sanwa or HAPP controls?
Sanwa sticks and buttons are light, sensitive and popular for fighting games and Japanese shooters. HAPP controls are stiffer, like 1980s American arcades. Neither is wrong; check which your kit's control panel is drilled for.
How hard is the wiring?
With a zero-delay encoder kit, it's plug-and-play: each button and joystick connects to the encoder with a pre-made cable, and the encoder plugs into USB. No soldering is needed.
Can I modify an Arcade1Up cabinet?
Yes, it's one of the most popular projects in the hobby. Builders replace the original board with a Raspberry Pi or PC, reuse or upgrade the controls and often swap the screen. Expect to void the warranty.
 Just Beginning