Landscape photography rewards early alarms more than expensive gear. The real purchases are a wide lens and a tripod that holds still. Here is what to buy first, what a filter really does, and what can wait until you are shooting every weekend.
By Colin B. · Published November 1, 2026 · Last reviewed November 1, 2026
RF 16mm f/2.8 STM
— A $299 ultra-wide prime that is sharp, tiny, and the cheapest way to get real landscape width.
EOS R8 (Body Only)
— A $1,399 full-frame body with the dynamic range landscapes need, in a package light enough for a hike.
Befree Advanced Travel Tripod
— A $200 travel tripod that folds small and stays steady in wind. The best money you will spend.
Budget total
$1200
Typical total
$2030
A Canon R50 with the RF-S 10-18mm, a budget tripod, and a polarizer gets you shooting for about $1,200. Our recommended picks (EOS R8, RF 16mm, Manfrotto Befree, ND1000, polarizer, remote) land near $2,000, and the tripod and lens will outlast several camera bodies.
We earn commission on qualifying Amazon purchases — see our
affiliate disclosure.
Price tiers and budget totals shown above are editorial estimates;
actual Amazon prices vary.
At a glance
Our top pick in each category
The fastest path through this guide — each best-starter pick by category.
Scroll for the budget and upgrade alternatives.
Spend on the tripod before the camera. A sharp image at dawn means a 1-second exposure at low ISO, and that needs a tripod that does not wobble. A $200 tripod with a $730 camera beats a $2,000 camera on a $40 tripod.
Pick the lens system first. Canon RF, Sony E, and Nikon Z lenses do not cross over. We use Canon RF here because the lenses are cheap and the R8 is light, but the advice (wide prime, sturdy tripod, polarizer) carries to any brand.
Filters are sized to the lens thread. The RF 16mm takes 43mm, the RF-S 10-18mm takes 49mm, the RF 15-35mm takes 82mm. Choose your size on the listing, or buy one large filter and add step-up rings.
Landscapes are the easiest genre on a camera: the subject does not move and you control the light with a tripod. What helps is dynamic range (detail in bright skies and dark foregrounds), a good screen for composing, and low weight for the hike in. Megapixels matter less than you think. Any modern mirrorless body at 24 megapixels will print big.
Best starter
Canon
EOS R8 (Body Only)
$$$$
★★★★★Our rating
The R8 is Canon's lightest full-frame camera, and it is the one we would buy. Full-frame means cleaner shadows and a wider view from every lens, 24 megapixels is plenty, and it weighs about 1.1 lb so it does not punish you on a trail. Around $1,400 body only.
What we like
Full-frame sensor recovers detail in dark foregrounds
Light enough to carry on all-day hikes
Fully articulating screen helps with low tripod angles
The cheapest way into the RF system at about $730. The APS-C sensor makes your lenses look tighter, so a 10-18mm zoom lands where a 16-29mm lens would on full-frame, which is still plenty wide. It shares lenses, filters, and tripod with the R8, so nothing is wasted when you upgrade.
What we like
Under $750 and lighter than the R8
Same RF mount, so lenses carry over to full-frame
Good autofocus for the occasional wildlife or sunrise runner
What to know
Smaller sensor gives less shadow detail than full-frame
No remote cable port; use the BR-E1 wireless remote
Pick this up once you know you are in. In-body stabilization, a dual-card setup, a bigger battery, and sturdier weather sealing make it the body that stays in your bag for years. At about $2,000 it is overkill until you are shooting most weekends.
What we like
In-body stabilization helps handheld shots at golden hour
Dual card slots and a larger battery
Better weather sealing for rain and spray
What to know
Around $2,000 for a camera that shoots the same landscape as the R8
The wide lens is the landscape lens. Between 14mm and 24mm (full-frame) you can stretch a foreground rock, a middle-distance lake and a far ridgeline into one frame, which is the classic landscape look. Kit lenses that start at 24mm are not wide enough. Buy an ultra-wide before anything else.
Wide-Angle Lenses — what's the difference?
A few common shapes, each making a different trade.
Ultra-wide prime
One focal length, small, sharp, and cheap. Forces you to move your feet.
The best $300 you will spend in photography. It is tiny, sharp enough for big prints, and wide enough that a foreground rock and a mountain both fit. It mounts on the R50 and the R8. The 43mm thread means filters are small and cheap.
What we like
Under $300 and light enough to forget in the bag
Wide enough for foreground-heavy compositions
Sharp in the center, even wide open
What to know
Plastic build and visible vignetting that needs correcting
The right lens for the R50. On APS-C it covers about 16-29mm, so you get ultra-wide and a normal-wide in one lens with stabilization. About $320. It will not mount on a full-frame R8 without cropping, so buy it only if you are staying on APS-C.
The wide zoom professionals use. Edge-to-edge sharpness, weather sealing, and f/2.8 for night skies and low light. At about $2,400, wait until you have shot with the 16mm for a year and know you want a zoom.
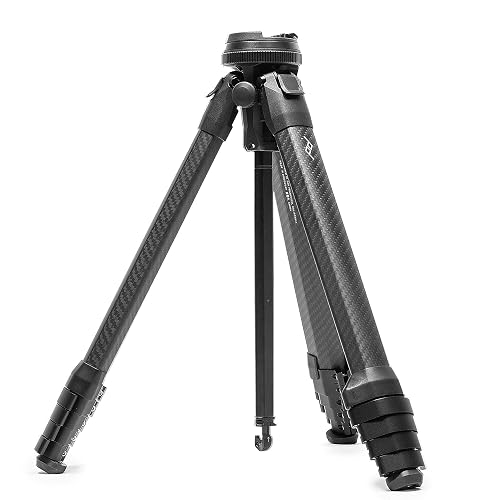
This is the one purchase that improves every landscape photo. A tripod lets you shoot at ISO 100, f/8 to f/11, and a slow shutter speed for maximum sharpness, and it forces you to slow down and compose. Skip the $30 tripods. They sag, shake in wind and flex when you tighten the ball head. Plan on $150 to $400.
Best starter
Manfrotto
Befree Advanced Travel Tripod
$164.95 as of Jun 22, 2026
★★★★★Our rating· In Stock
The sweet spot for almost everyone. It folds to about 16 inches, weighs 3 lb, and the lever locks are fast with cold hands. Holds an R8 and a heavy lens without drift. Around $200.
Around $110 for a tripod that is genuinely stable if you do not extend the center column. It is heavier and bulkier than the Manfrotto, but it works. Buy this if $200 is a stretch and plan to upgrade later.
The tripod serious travelers eventually buy. It packs to the size of a water bottle, weighs 2.8 lb, and carbon fiber is warmer in your hand and kills vibration. About $400. It is the right buy when you hike a lot and hate the weight of your current one.
What we like
Packs to the size of a water bottle
Carbon fiber dampens vibration and stays light
Ball head and phone mount built in
What to know
About $400, double the Manfrotto
Setup differs from a normal tripod; practice at home
Two filters earn their place. A circular polarizer cuts glare on water and leaves, deepens blue skies, and costs about $50. A 10-stop ND filter (ND1000) lets you shoot a 30-second exposure in daylight for silky water and streaking clouds. Skip graduated ND and UV filters until you know why you want them.
Best starter
K&F Concept
77mm Circular Polarizer (Nano-X)
$$
★★★★★Our rating
Buy the polarizer first. It does the one thing software cannot: it removes glare from wet rocks and leaves so colors look richer straight out of the camera. About $50. Choose the thread size that matches your lens in the listing, since 77mm is only one option.
What we like
Cuts glare on water and foliage
Slim frame avoids vignetting on wide lenses
Under $50 for good coated glass
What to know
Costs you about 1-2 stops of light
Effect varies by sun angle; wrong angle does nothing
A 10-stop ND turns a 1/30-second shot into 30 seconds in daylight, which is how you get silky waterfalls and moving clouds. The magnetic system snaps on in seconds. About $55 with the base ring and cap. Pick it up after a month of shooting.
What we like
Magnetic mount snaps on in seconds
10 stops of light reduction for daytime long exposures
Two small things make a day out better. A wireless remote avoids touching the camera on a long exposure, and a camera backpack lets you carry the tripod and a layer for the walk to the viewpoint. A headlamp matters because the best light starts before sunrise.
Best starter
Canon
Wireless Remote Control BR-E1
$$
★★★★★Our rating
Pressing the shutter shakes the camera and ruins a long exposure. This Bluetooth remote fires the shutter from your hand for about $26, and works with the R8, R50, and R6 II. Cheaper than a cable release, and you will use it all the time.
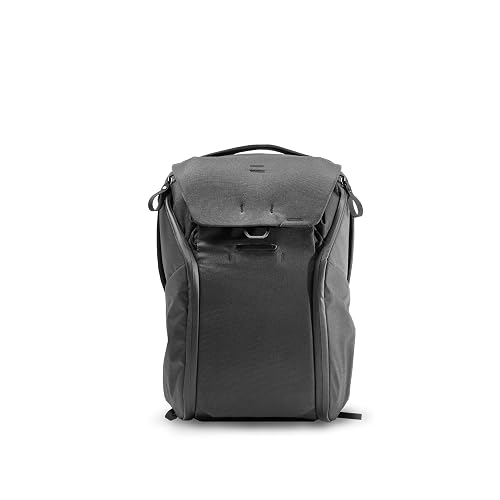
A camera backpack with side access so you can grab the camera without removing it, and straps that hold the tripod. About $230. Don't buy it until you notice your current bag is the thing holding you back.
What we like
Side access to the camera without taking the bag off
Landscape photography looks effortless in other people's photos. Here is what the first month really looks like, from the first dull sunrise to the shot that finally works, and the habits that get you there faster.
Landscape photography is the one genre where your camera hardly matters and your alarm clock matters a lot. The learning curve is gentle on settings and steep on patience: you will come home with a card full of flat, gray pictures before one sunrise lines up.
That is normal. Here is what the first month actually looks like.
Week 1: Learn the boring settings
You only need a handful of settings, and they barely change from shot to shot.
Put the camera on a tripod. This is what turns a decent photo into a sharp one.
ISO 100 (or your camera’s lowest native ISO). Noise is the enemy and the tripod lets you avoid it.
Aperture f/8 to f/11. This keeps the foreground and the mountain both sharp. Wide-open apertures blur one or the other.
Aperture priority mode. Let the camera pick the shutter speed. A 2-second exposure on a tripod is fine.
Turn off image stabilization on the tripod if your lens or body has it, and use a 2-second timer or a remote so you never touch the camera during the shot.
Shoot in RAW. The files are bigger, but you can recover a washed-out sky and brighten dark foregrounds in editing, which is what every landscape you admire has done.
Do not worry about filters or fancy techniques yet. Shoot your yard, a local park, and the nearest hill. You are training your eye, not building a portfolio.
The same place at noon and at sunrise is two different photos. Harsh midday sun flattens everything. The hour after sunrise and the hour before sunset, called golden hour, gives you low, warm, directional light that rakes across the land and gives it shape.
Get to your spot 30 minutes before sunrise. Many of the best shots come in the 20 minutes before the sun clears the horizon, when the sky glows. Bring a headlamp, a warm layer, and patience.
Check the weather the night before. A boring clear sky makes boring photos. Clouds, fog, and the edge of a storm are what you are hoping for. Bad weather is good news.
Week 3: Compose with layers
A beginner’s landscape usually has one thing in it: a mountain, or a lake. The photos that stop people have three layers.
Foreground. A rock, a flower, a curve of the shoreline, something close to the lens.
Middle ground. A lake, a meadow, a tree line.
Background. Mountains, sky, the sun.
With a wide lens, get low and close to the foreground subject. Put it in the bottom third of the frame, and let it lead the eye through the picture. Walk around before you set up. Ten steps left or a foot lower can turn a snapshot into a composition.
Keep the horizon off the center. Put it in the top third when the land is interesting, the bottom third when the sky is.
By now you know what you want your photos to do. Two filters help.
A circular polarizer removes glare from water and wet leaves and deepens a blue sky. Rotate it while you look through the viewfinder until the glare drops. It works best when the sun is at a right angle to your subject.
A 10-stop ND filter lets you shoot 30-second exposures in daylight. Point the camera at a stream or a shoreline, compose, screw it on, and let the water blur. Use a remote, keep the camera still, and take a test shot at 5 seconds before committing.
The mistakes everyone makes
Skipping the tripod. Handheld photos at dusk look soft, and you cannot fix soft in editing.
Tilted horizons. Turn on the grid overlay and level the camera. It is the most common flaw in beginner landscapes.
Leaving the tripod legs extended. The center column is the wobbliest part. Use the legs, and keep it low in wind.
Giving up at a gray sunrise. Stay 20 minutes after the sun is up. The light often shows up late.
Buying more lenses instead of going out more. One wide lens and a tripod will carry you for a year.
By the end of the month you will have a few frames you are proud of, a better sense of where the sun rises, and a new tolerance for early alarms. That is a good start.
Save your money
What you don't need yet
Beginners get pressured to buy a lot of stuff that doesn't help them play
better. Here's what we'd skip on day one.
A graduated ND filter — A square filter system costs $150 and more. Shoot two exposures and blend them, or use a camera with good dynamic range like the R8.
Fast f/1.4 lenses — Landscapes are shot at f/8 to f/11. Wide apertures matter for stars, not for most scenes, and they cost four times more.
A $600 ball head — The one that comes with a decent tripod is fine until you start panoramas, and by then you will know exactly what you want.
First week
Your first seven days
A short, real plan to get from gear-on-doorstep to actually playing.
Check the sunrise time and weather for tomorrow, and pick a viewpoint within an hour's drive. · Action
Order the wide lens and a tripod that fits your budget. · Buy
Shoot one sunrise or sunset with a clear foreground, a middle subject, and a far background. Try the same scene at three heights. · Action
Look up the Leave No Trace principles before your first off-trail shoot. · Learn
Leave No Trace · Outdoor ethics for photographers who go off the beaten path
FAQ
Common questions
How much does it cost to start landscape photography?
About $1,200 with a Canon R50, the RF-S 10-18mm, a budget tripod and a polarizer, or about $2,000 with our recommended picks. The tripod and lens hold their value, so you can resell them if you quit.
Do I need a full-frame camera for landscapes?
No. A 24-megapixel APS-C camera like the R50 prints large and handles most scenes. Full-frame helps in dark foregrounds and high-contrast skies, but it matters less than a good tripod and lens.
Can I start with my phone?
Yes. Modern phones shoot excellent landscapes in good light. Add a $30 phone tripod to learn composition and long exposures. Upgrade to a camera when you want bigger prints or a wider lens.
What is the best time of day to shoot?
The hour after sunrise and the hour before sunset, called golden hour. The light is soft and warm and the shadows give the land shape. Midday sun flattens everything, so use that time to scout.
What is a 10-stop ND filter for?
It darkens the scene so you can use a 30-second shutter in daylight. Water goes silky and clouds streak. It is not required, but it is the most fun filter to own.
As an Amazon Associate, JustBeginning earns from qualifying purchases.
We may also earn commission from other affiliate programs linked on this
page. Editorial recommendations are independent; we don't choose
products based on commission rates.
Product prices and availability are accurate as of the date and time
indicated and are subject to change. Any price and availability
information shown on Amazon at the time of purchase will apply.


 Best starter